
Post by Deleted on Jun 4, 2012 15:24:36 GMT -5
In this case, I modified the 143 to fit onto my 182.
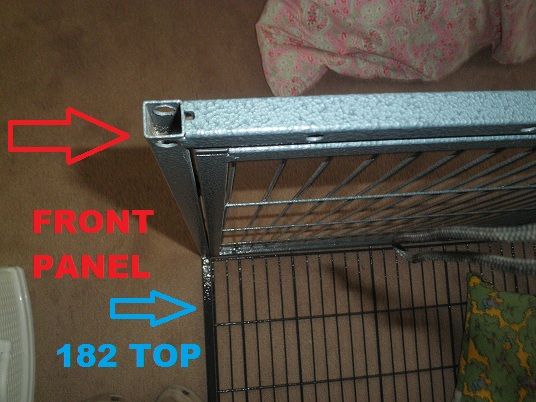
Start off by taking the top off the 182. Please do ignore the hammock you can see on the top of the 182 as I was too lazy to take it off lol.
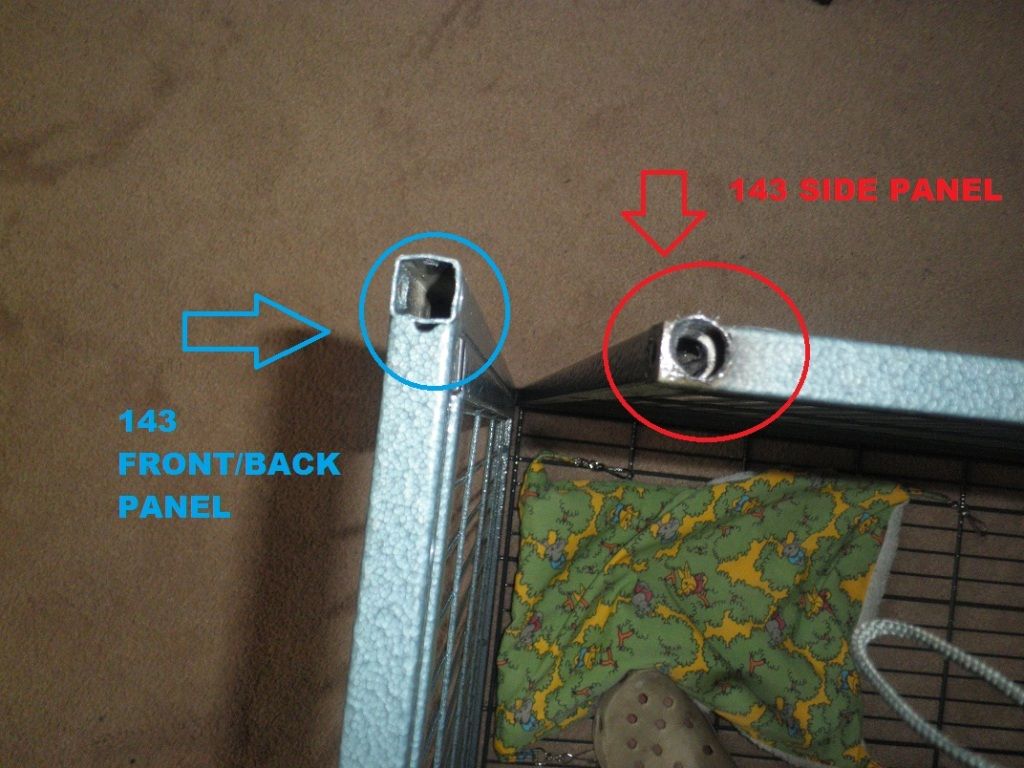
As you can see, the front/back panels of the 143 have holes on the top and bottom whereas the side panels do not.
Using a 7/16 metal drill bit, drill holes on the top and bottom corners of the side panels. Altogether you will have 4 holes in each panel. I found it easier to drill a smaller hole using a small drill bit and then using the 7/16 drill bit. When you are drilling it will go in the first time once the top is drilled, you want to keep drilling until the bit goes down again, then you can be certain you have drilled far enough. The corners should look like this:

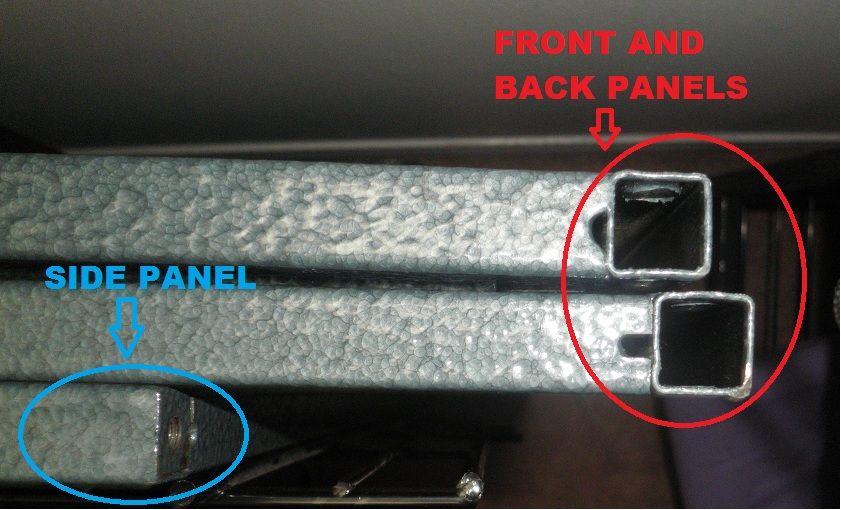
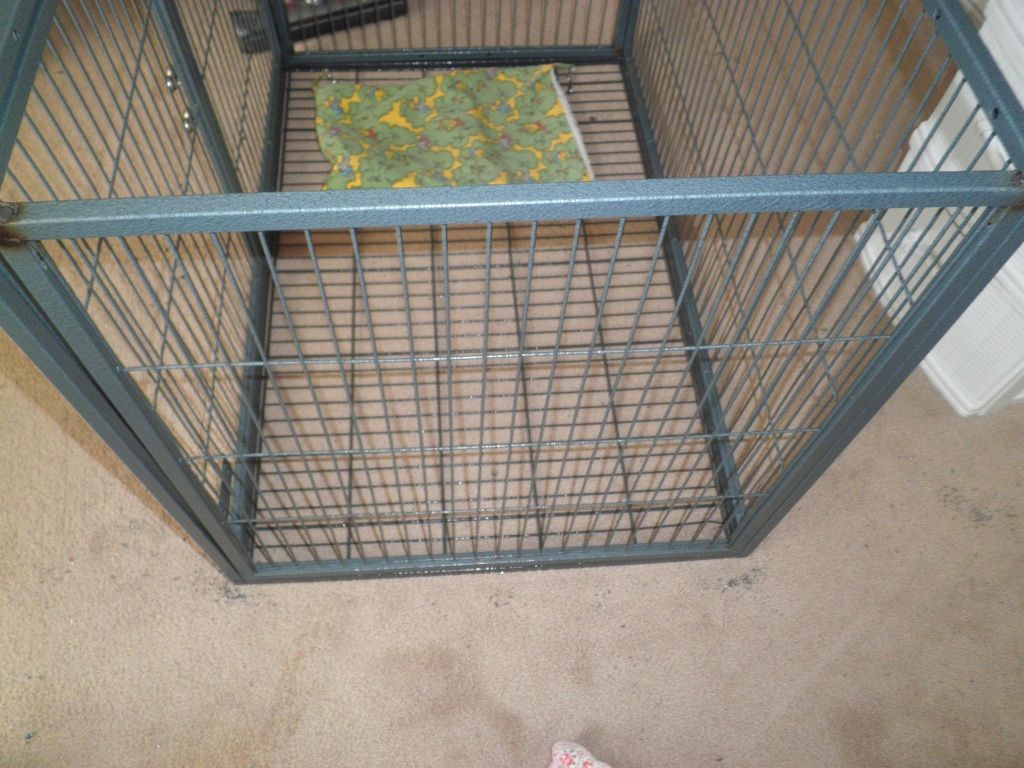
With the top of the 182 on the floor, you want to insert the front/back panels of the 143 just as you normally would with a 180 series panel.
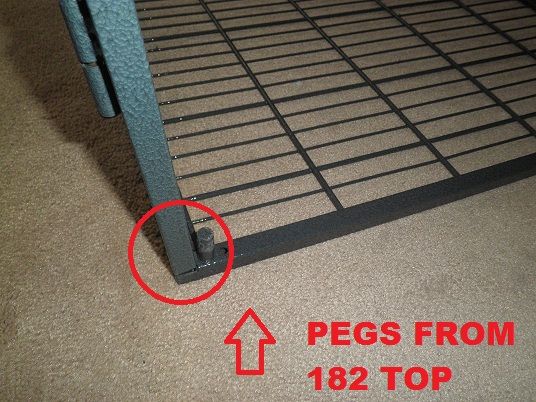
You can see the pegs where you would insert the side panels also.
Using a hammer, you want to place the 143 side panels onto the pegs, it should be a hard task and fit very very snug. Once you fit it on, flip the side panel and hammer in the bottom as well to stretch the holes a bit so it's not as difficult to put it together later on.
This is after all 4 sides have been inserted.
Now, hammer in all the corners a bit. You want to get hardwood dowel pins size 1/2" x 2" to hammer into the corners that will act as pegs to insert onto the second tier of the 182. I used contact cement adhesive on the pegs and inside the holes to bond them together. Always allow proper drying time as directed. I flipped the add on onto its side, but this is what you should end up with:

Again, the dowels should really really be on there!
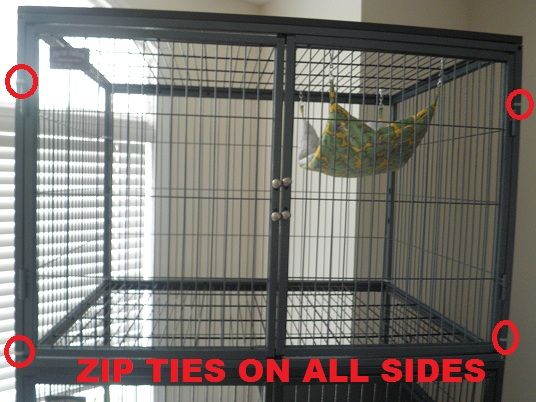
Once they are all dry, take the add on apart and place it onto the second tier of the 182 just as you would normally assemble the cage and with the dowels on the bottom. You will find that you need to hammer the sides in and the top on which is good since you know it is secure! Place zip ties on the sides of the 143 and if you wish from the 143 to the 182 to give an extra bit of security to the cage. It should look like a normal add on now.
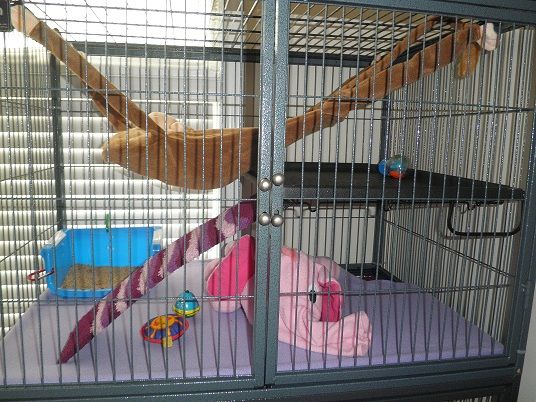
The fun step...accessorize!!!
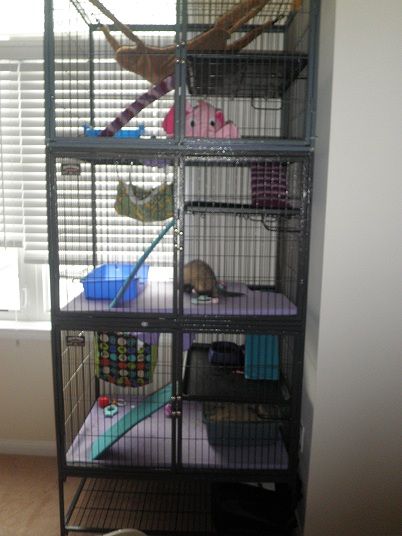
The final product
Start off by taking the top off the 182. Please do ignore the hammock you can see on the top of the 182 as I was too lazy to take it off lol.
As you can see, the front/back panels of the 143 have holes on the top and bottom whereas the side panels do not.
Using a 7/16 metal drill bit, drill holes on the top and bottom corners of the side panels. Altogether you will have 4 holes in each panel. I found it easier to drill a smaller hole using a small drill bit and then using the 7/16 drill bit. When you are drilling it will go in the first time once the top is drilled, you want to keep drilling until the bit goes down again, then you can be certain you have drilled far enough. The corners should look like this:
With the top of the 182 on the floor, you want to insert the front/back panels of the 143 just as you normally would with a 180 series panel.
You can see the pegs where you would insert the side panels also.
Using a hammer, you want to place the 143 side panels onto the pegs, it should be a hard task and fit very very snug. Once you fit it on, flip the side panel and hammer in the bottom as well to stretch the holes a bit so it's not as difficult to put it together later on.
This is after all 4 sides have been inserted.
Now, hammer in all the corners a bit. You want to get hardwood dowel pins size 1/2" x 2" to hammer into the corners that will act as pegs to insert onto the second tier of the 182. I used contact cement adhesive on the pegs and inside the holes to bond them together. Always allow proper drying time as directed. I flipped the add on onto its side, but this is what you should end up with:
Again, the dowels should really really be on there!
Once they are all dry, take the add on apart and place it onto the second tier of the 182 just as you would normally assemble the cage and with the dowels on the bottom. You will find that you need to hammer the sides in and the top on which is good since you know it is secure! Place zip ties on the sides of the 143 and if you wish from the 143 to the 182 to give an extra bit of security to the cage. It should look like a normal add on now.
The fun step...accessorize!!!
The final product


 lol!!
lol!! 
