Post by Deleted on May 18, 2012 22:05:06 GMT -5
Alrighty, here is our custom built tunnel to cage hook up system.
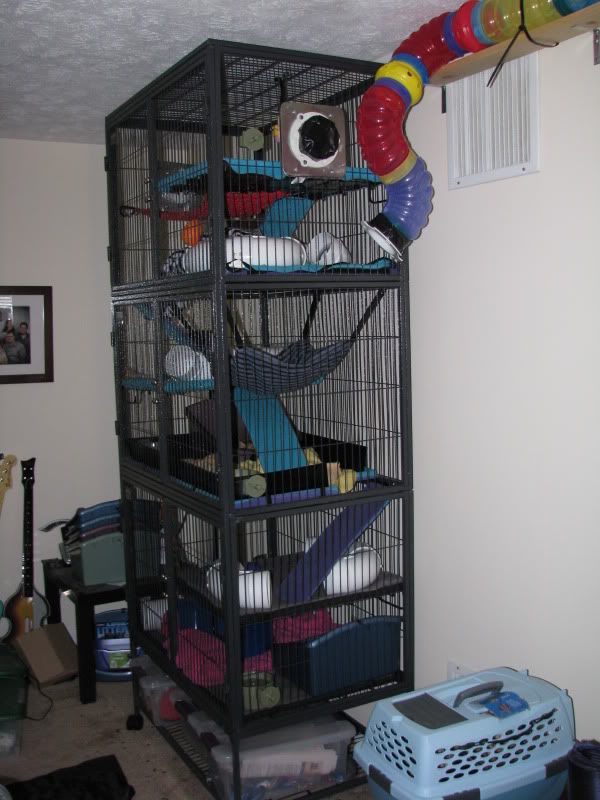
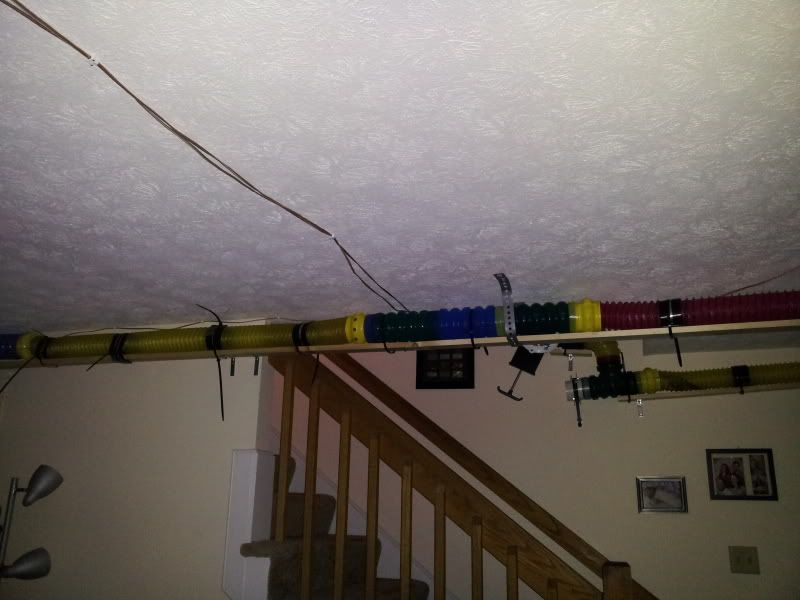
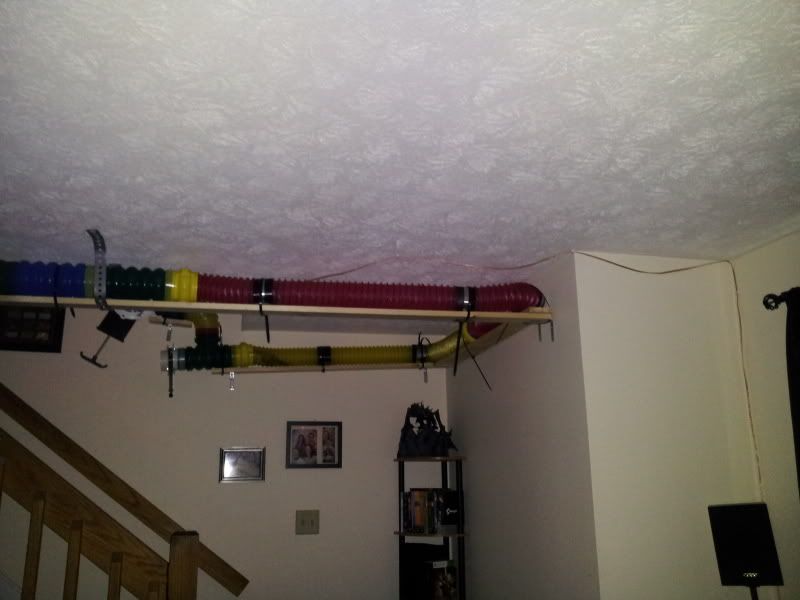
Here is a standard FN triple unit cage. Note the odd looking contraption on the top level. This is where the tunnel connects, you can see the tunnel line running up near the ceiling.
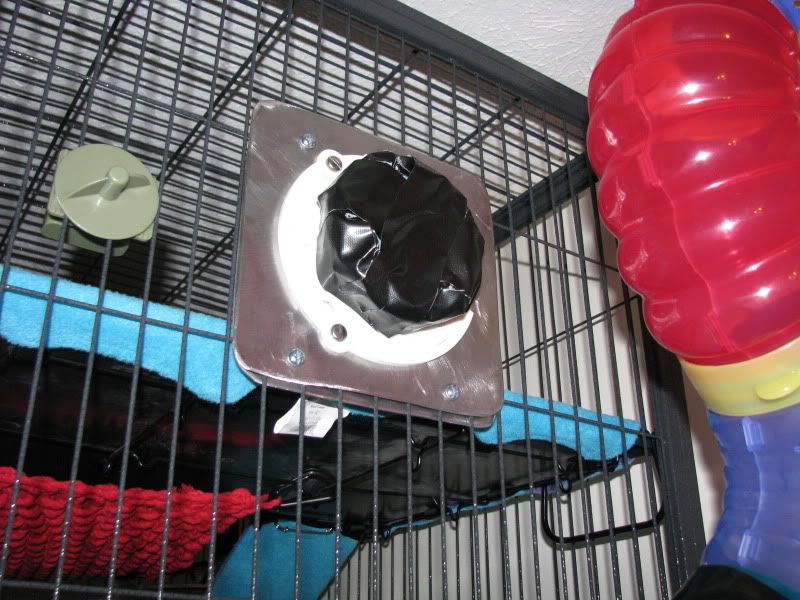
A close up of the dead cap that we put on when we don't want the tunnel connected. We intend to obsolete these by installing gate valves directly onto the cage plates themselves when we have the time. (More on the gate valves in a bit!) The dead cap is made of a dryer quick release with a plastic end cap on the end that we secure with a line of gorilla glue and then gorilla tape.
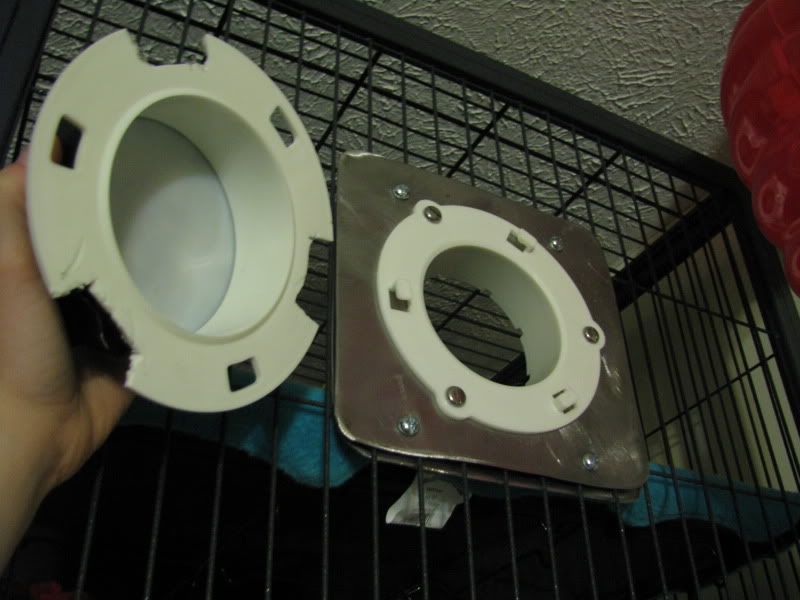
Here is the inside of end cap. It just twists on and off on the little tabs. The sheet metal is 16 gauge steel we custom cut down (I think it's about 8" x 8"ish. Need to ask the bf.) We cut the center hole with a 4" key hole bit on a drill with lots of oil, drill holes for the bolts and acorn nuts (to cover the screw heads on the inside of the cage) and then grind the corners down to a rounded shape, and sand sharp spots all over as needed. We are currently experimenting with a lighter gauge steel sheeting.
Here you can see hard tubing connected to the cage:

Soft tubing also works fine. We intend to replace all of the soft, flexible tunnels with the hard stuff as our budget allows since it gets torn too easily:
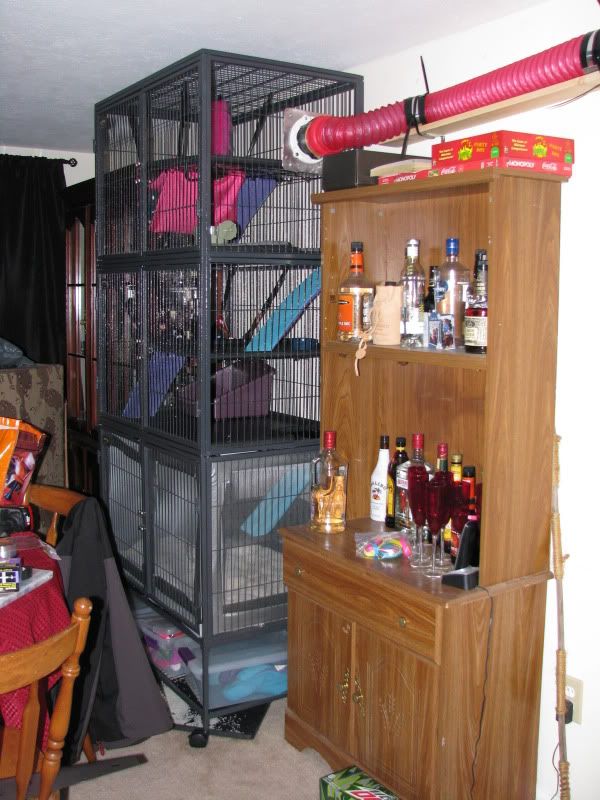
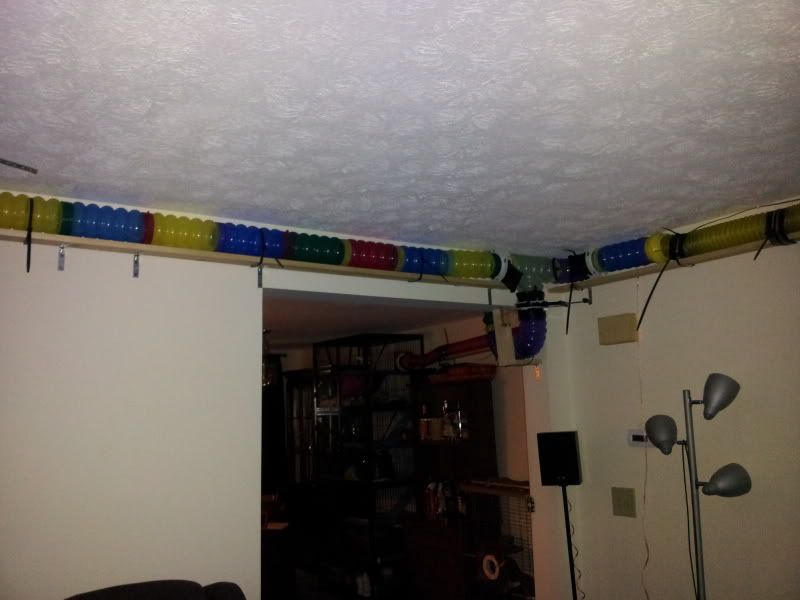
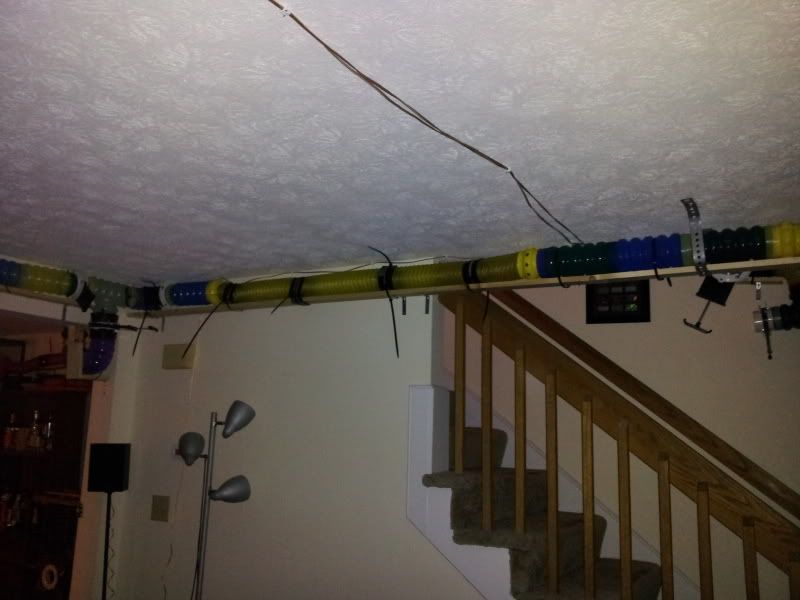
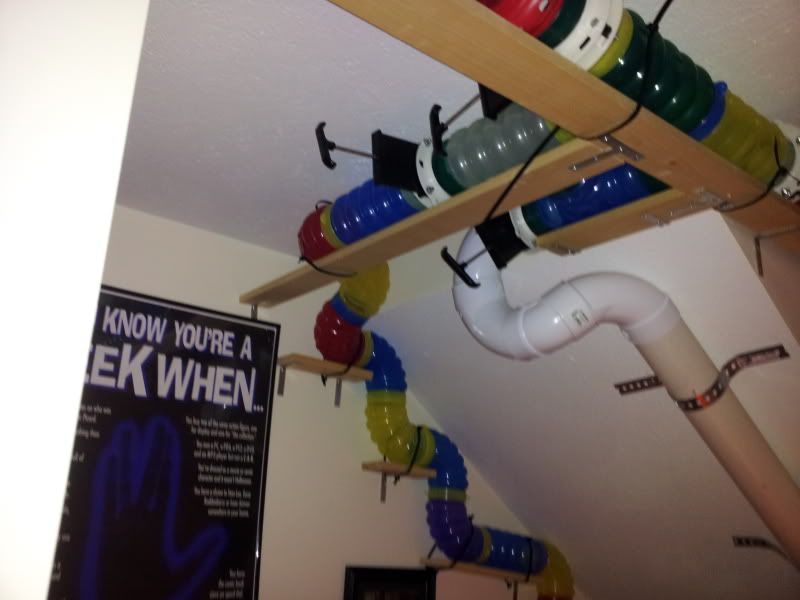
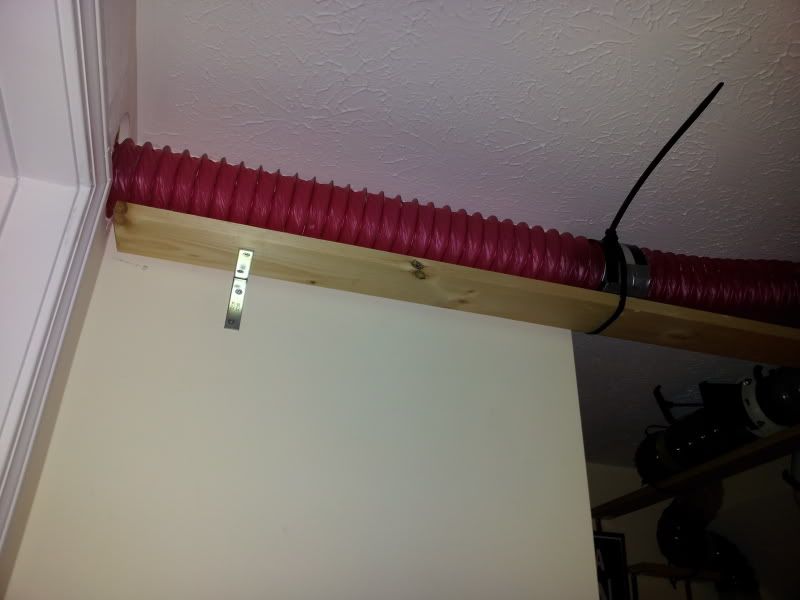
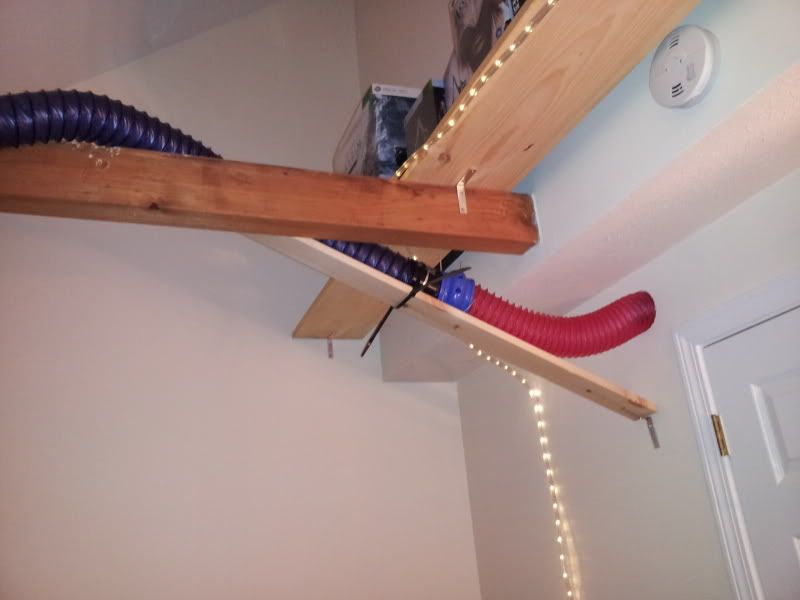
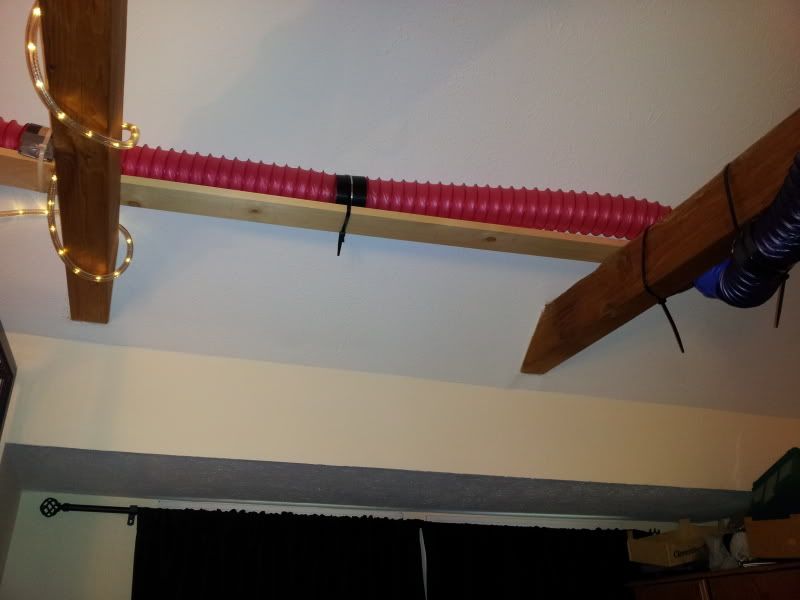
We secure our tunneling onto boards with large zip ties, the boards are held onto the wall with L brackets (and mollies where we can't find studs.) For the flexible tunnel sections, we cut strips of roofing tin and then gorilla taped the edges so they weren't sharp. We then wrapped this around the 4" tubing and then zip tied over it onto the board. We did this so that the pressure of the tightened zip ties does not cut or crush the tubing- the tin spreads the pressure a bit more evenly.
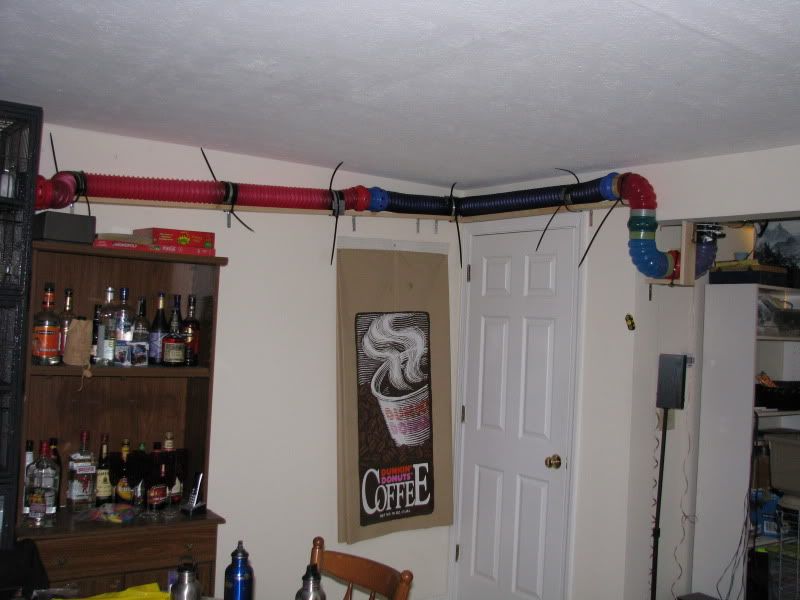
One of my boyfriend's best ideas is the gate valve system as seen below. We can slide a gate valve open or closed to seal off a pathway into a room, or the entire upstairs/downstairs as needed.

This system has been very costly to build, particularly since we had to buy the tools we needed since we did not have them already. The gate valves are like $6 each, the flexible tunnel is like $13 an 8' section, hard plastic pieces are about $8 a 1' section, or you can buy the "maze" and get some good deals on it. The dryer quick releases are about $14 a set I believe, the sheet metal is like $20 a 2' x 2' sheet, plus the necessary bolts and acorn nuts, bits for the drill, sand paper etc. I have some videos and pictures of steps in progress I want to post for people when I have time so they can try it for themselves. Please let me know if you have questions! We cut the cage bars using bolt cutters.
7/2/12 UPDATE:
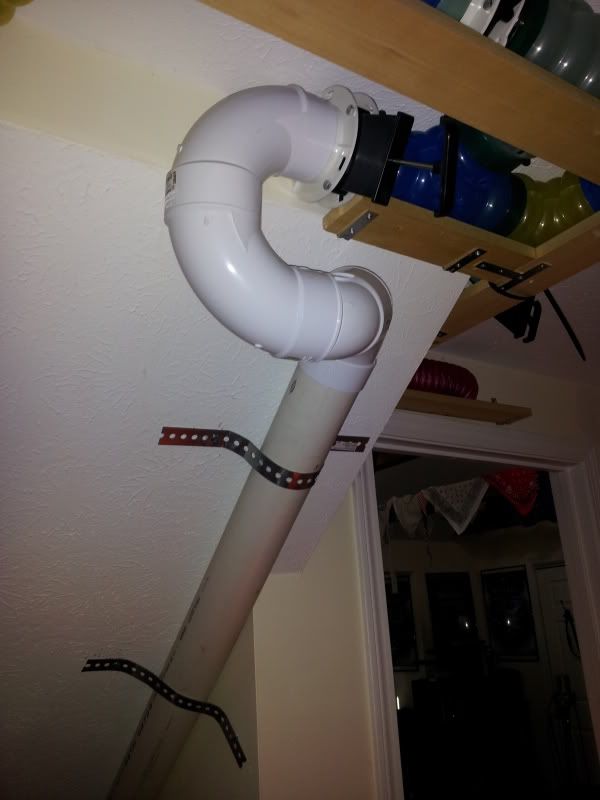
We had to add in some support by the cage with the hard tubing and we finally got the slide up and our last two 183's came in so we can start connecting our 2 FN cages upstairs. We are waiting for some shipments of parts to come in this week to finish the second cage with the ball pit. We also have started putting gate valves directly on the cages now so we don't have to disconnect them from the tunnels. But for now, enjoy our improvements to the system.
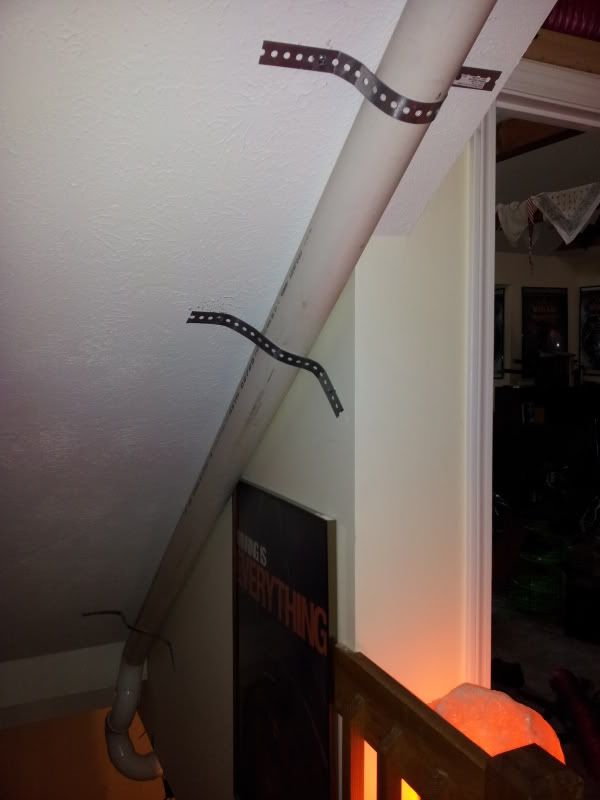
Oh and I know you're wondering- Yes 2-3 of them have tried the slide and at least one of them really loves it. The first time Artemis went down he was all panicky and trying to scrabble back up it. Then he got to the bottom, ran the circuit loop and came back up the stairs and promptly dove back into the slide. This time with no resistance. He went down it a third time later. I'd say he's enjoying himself. Oh, he also had black paws from the dust in the slide. ;D It's so awesome to hear/see them scrabbling around the house in the tunnels going upstairs and down freely.
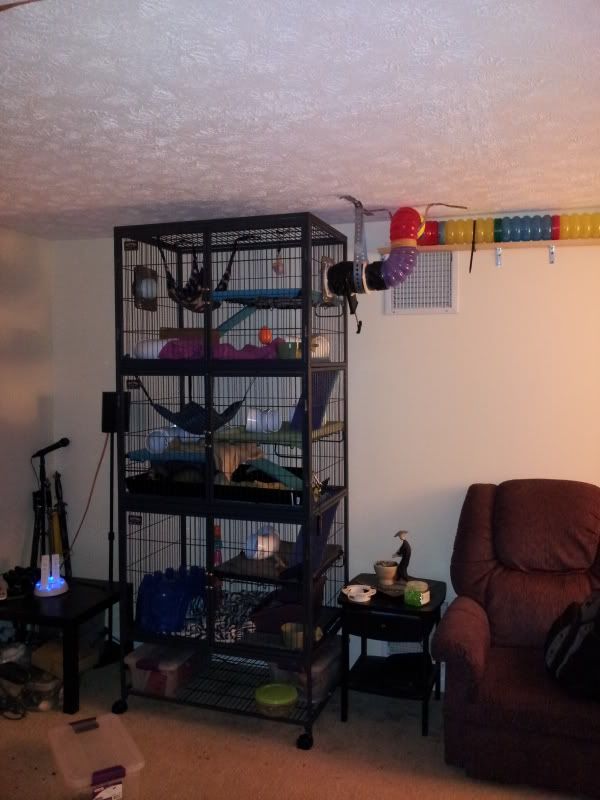
Here is ze main cage, now with brackets for stability and safety:
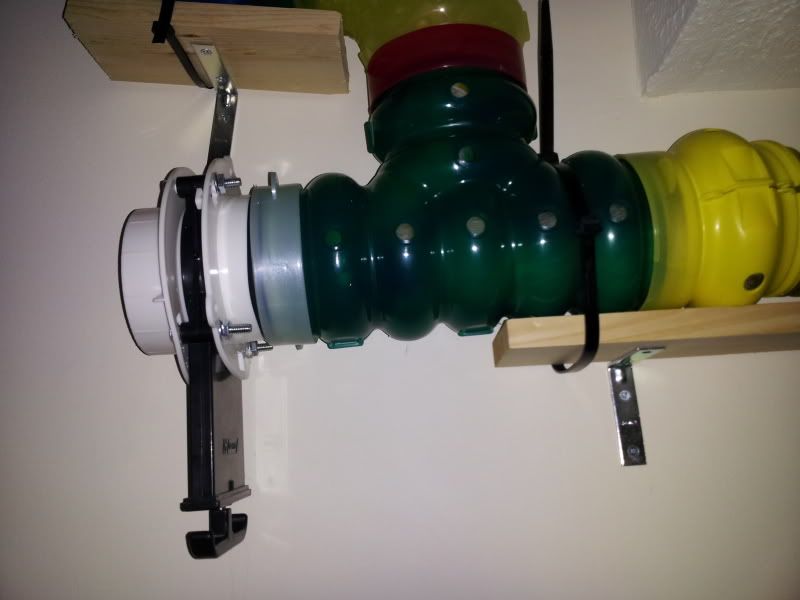
A close up of the quick access we put in in a few places. Still adding more of these. It basically allows us to grab a distressed ferret or to place one in to the system in a hurry. Chelly will demonstrate:
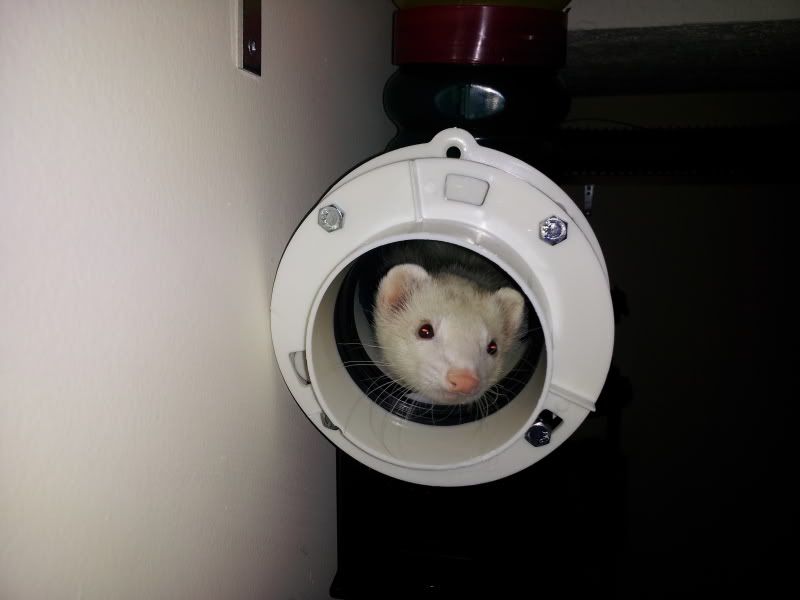
"Are you my mummy?"


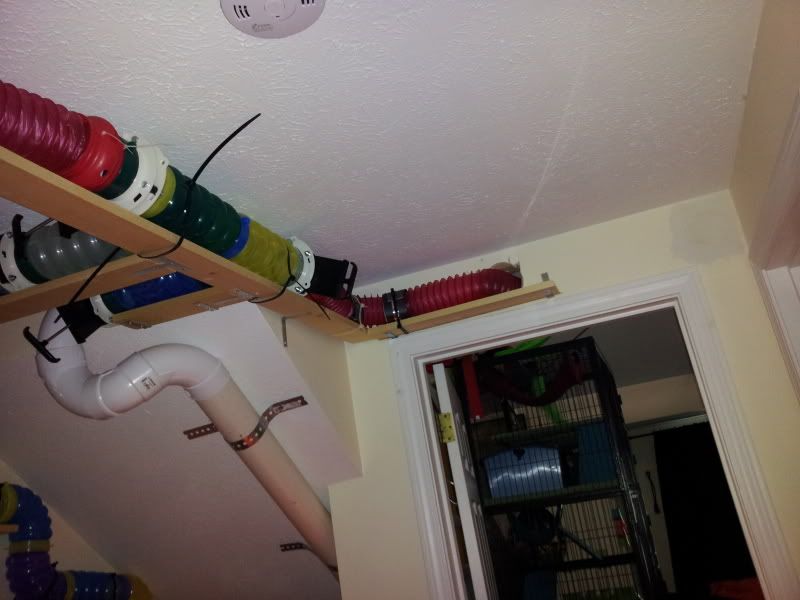
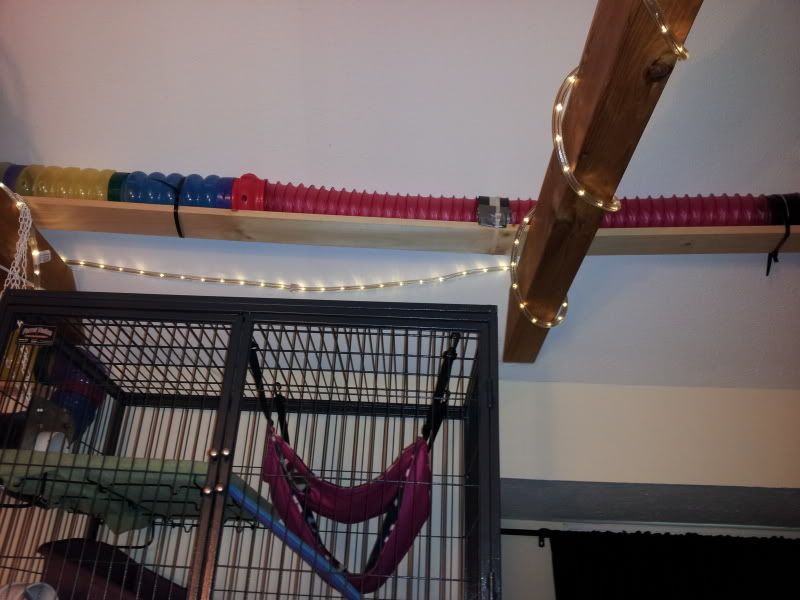
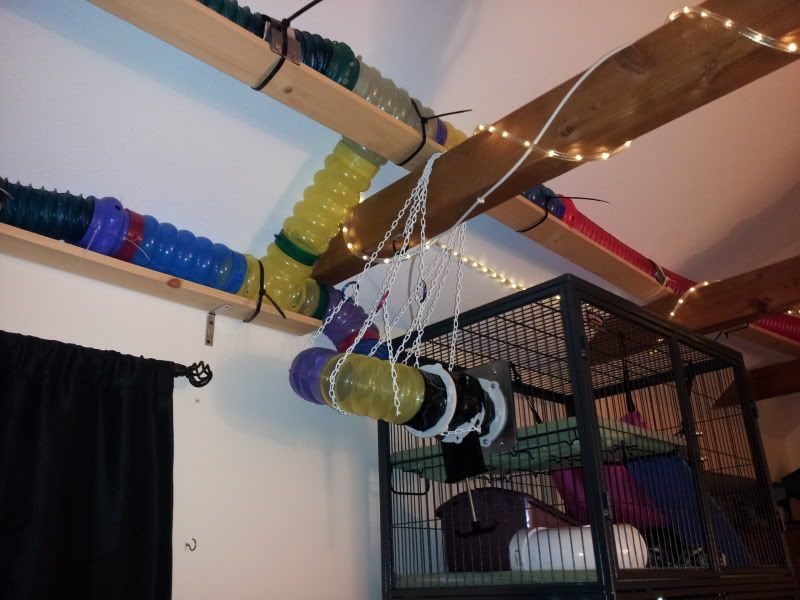
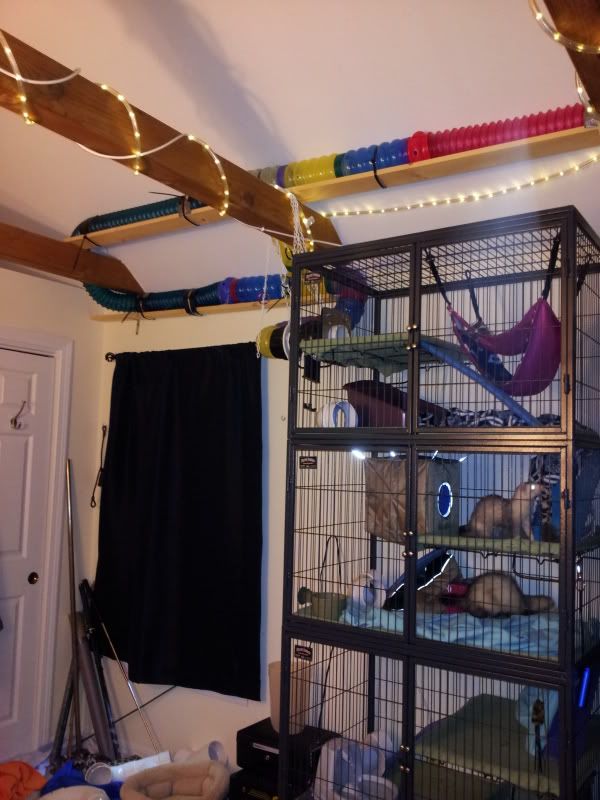
Here is a standard FN triple unit cage. Note the odd looking contraption on the top level. This is where the tunnel connects, you can see the tunnel line running up near the ceiling.

A close up of the dead cap that we put on when we don't want the tunnel connected. We intend to obsolete these by installing gate valves directly onto the cage plates themselves when we have the time. (More on the gate valves in a bit!) The dead cap is made of a dryer quick release with a plastic end cap on the end that we secure with a line of gorilla glue and then gorilla tape.

Here is the inside of end cap. It just twists on and off on the little tabs. The sheet metal is 16 gauge steel we custom cut down (I think it's about 8" x 8"ish. Need to ask the bf.) We cut the center hole with a 4" key hole bit on a drill with lots of oil, drill holes for the bolts and acorn nuts (to cover the screw heads on the inside of the cage) and then grind the corners down to a rounded shape, and sand sharp spots all over as needed. We are currently experimenting with a lighter gauge steel sheeting.

Here you can see hard tubing connected to the cage:

Soft tubing also works fine. We intend to replace all of the soft, flexible tunnels with the hard stuff as our budget allows since it gets torn too easily:

We secure our tunneling onto boards with large zip ties, the boards are held onto the wall with L brackets (and mollies where we can't find studs.) For the flexible tunnel sections, we cut strips of roofing tin and then gorilla taped the edges so they weren't sharp. We then wrapped this around the 4" tubing and then zip tied over it onto the board. We did this so that the pressure of the tightened zip ties does not cut or crush the tubing- the tin spreads the pressure a bit more evenly.

One of my boyfriend's best ideas is the gate valve system as seen below. We can slide a gate valve open or closed to seal off a pathway into a room, or the entire upstairs/downstairs as needed.

This system has been very costly to build, particularly since we had to buy the tools we needed since we did not have them already. The gate valves are like $6 each, the flexible tunnel is like $13 an 8' section, hard plastic pieces are about $8 a 1' section, or you can buy the "maze" and get some good deals on it. The dryer quick releases are about $14 a set I believe, the sheet metal is like $20 a 2' x 2' sheet, plus the necessary bolts and acorn nuts, bits for the drill, sand paper etc. I have some videos and pictures of steps in progress I want to post for people when I have time so they can try it for themselves.
 Please let me know if you have questions! We cut the cage bars using bolt cutters.
7/2/12 UPDATE:
We had to add in some support by the cage with the hard tubing and we finally got the slide up and our last two 183's came in so we can start connecting our 2 FN cages upstairs. We are waiting for some shipments of parts to come in this week to finish the second cage with the ball pit. We also have started putting gate valves directly on the cages now so we don't have to disconnect them from the tunnels. But for now, enjoy our improvements to the system.
Oh and I know you're wondering- Yes 2-3 of them have tried the slide and at least one of them really loves it.
Here is ze main cage, now with brackets for stability and safety:


A close up of the quick access we put in in a few places. Still adding more of these. It basically allows us to grab a distressed ferret or to place one in to the system in a hurry. Chelly will demonstrate:

"Are you my mummy?"


